Labels ♥
- AIL (4)
- AmyMarie (1)
- Angela Newman (1)
- Anna Marine (1)
- AOG (1)
- ArtisticRealityTalent (2)
- Autumn (2)
- Awards (1)
- Barbara Jensen (1)
- BCA (1)
- ByWendyG (2)
- CamillaDrakenborg (2)
- CDO (14)
- Charles Bristow (1)
- Cinnamon Scraps (1)
- Cluster Frames (2)
- Collab Tag Templates (2)
- Crowe (3)
- CuteLoot (1)
- Designs By Sarah (1)
- Ditzy Dezigns (1)
- Easter (1)
- Eclipsy. GrnIz Dezinez (2)
- Elias Chatzoudis (4)
- Enamorte (2)
- Enys Guerrero (1)
- Fall (1)
- Forum Set (1)
- Foxy Designz (3)
- Freya Langford-Sidebottom Freya Langford-Sidebottom (1)
- FTU Tags (7)
- FTU Tutorials (15)
- Gaetano Di Falco (1)
- Garv (1)
- GeminiCreationz (1)
- GothicInspirations (1)
- Gothique Starr (3)
- GraphFreaks (1)
- GrnIz Dezinez (8)
- Grunge-Glitter (1)
- Hungry Hill (2)
- Indie-Zine (1)
- Inzpired Creationz (1)
- Irish Princess Designs (1)
- Jackie's Jewels (5)
- JoseCano (1)
- Keith Garvey (4)
- KiwiFireStorm (3)
- LexisCreationz (3)
- Misc. (3)
- My Tubed Art (3)
- O'ScrapCandyShack (5)
- PFD (1)
- PFD. Wendy Gerber (2)
- PicsforDesign (3)
- Pimpin' PSPers Warehouse (1)
- Pink (1)
- PMTwS (8)
- PTE (41)
- PTU Tags (33)
- PTU Tutorials (90)
- PurplesKreationz (3)
- Rabid Designz (4)
- Rac (13)
- Ricky Fang (1)
- Robert Alvarado (1)
- Roman Zaric (1)
- Roo (2)
- Sale (1)
- Sam'sScraps (1)
- ScrappinKrazyDesigns (1)
- Scraps and the City (1)
- ScrapsNCompany (1)
- Sherri Baldy (1)
- Snags (31)
- Spring (2)
- St.Patricks Day (2)
- Steve Baier (1)
- Tag Show Off (6)
- Tag Show off using my tutorials (1)
- Tag Templates (11)
- TaggersArt (1)
- TaggersDelight (1)
- Tags (2)
- Tashas Playground (18)
- TeaserTag (1)
- The PSP Project (20)
- TheARTofGiving (1)
- TimeThief (1)
- Tony Mauro (1)
- TonyT (3)
- Toxic Desirez (1)
- Tutorials (2)
- Tyger's Tidbits (1)
- UpYourArt (15)
- ValentinesDay (1)
- Verymany (5)
- Wendy Gerber (4)
- Wicked Princess Scraps (11)
- wordart (1)
- Xketch (1)
- ZlataM (3)
Powered by Blogger.
Tuesday, March 29, 2011
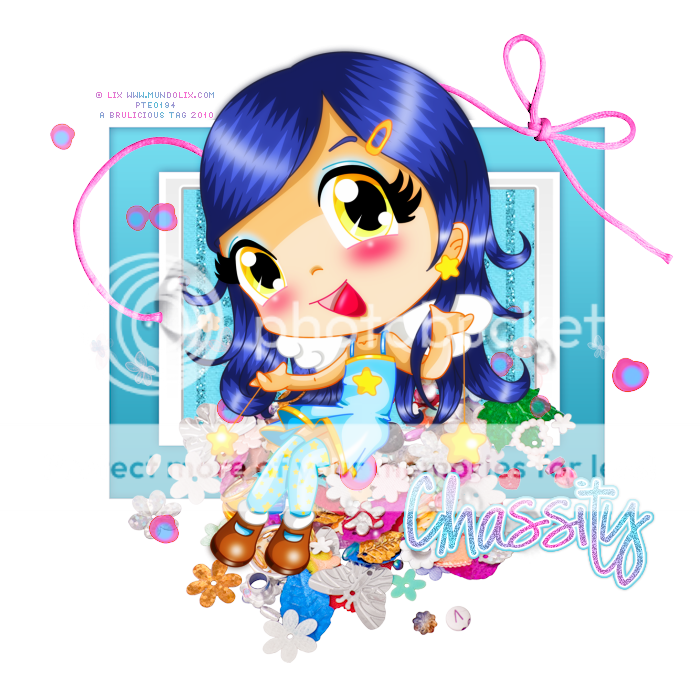
Cutesy
*Click the tag for a bigger view*
This tutorial was written by Brunette on March 29th 2011.
Any similarity to any other tutorial is purely coincidental.
Do not copy and paste my tutorials or claim as your own you may link to them for group challenges.
You'll need a tube of choice I am using the cute art of Lix you can purchase her art to use for tags atPTE. Lucky you this one is a freebie. YAY Thank you PTE and Lix!
Font of choice
Eye Candy 4000 - Gradient Glow
A kit of choice I am using a gorgeous collab kit by the wonderfully talented girls over at Pimp my tags with Scraps called Spring Love you can get it here.
Ready?
Let's get started!
Open up a new canvas 700x700 we can always re-size/crop later.
From the polka dot scraps part of the kit open up frame 4 copy and paste it as a new layer re-size it so it fits nicely on the canvas. Take your magic wand select inside the frame then go to selections-modify-expand by 3 then open up a paper of choice I used paper 3. Then go to selections-invert and hit delete, make sure this paper layer is UNDER the frame.
I used ribbon 1 from the kit re-sized it so it fit nicely on the frame and placed it at the top right of the frame. I also used scatter 1, scatter 2 and the water drops placing them in the middle bottom part of the frame.
Now copy and paste your tube as a new layer, I sort of placed her so she was sitting on top of scatter 1 element. Add a drop shadow.
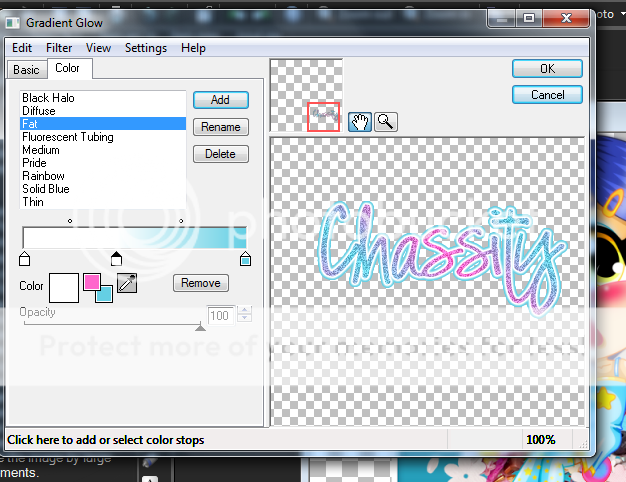
Now in a font of choice add your name I used a gradient of two colors from the tag but that is up to you how you want to do yours. Add a gradient glow and a drop shadow. Settings I used shown in the screen-shot below.
Finally add your copyright and license number if applicable save as png or jpeg whichever you prefer and we're done!
I hope you enjoyed this tutorial and found it easy to follow.
Labels:
PTU Tutorials
|
0
comments
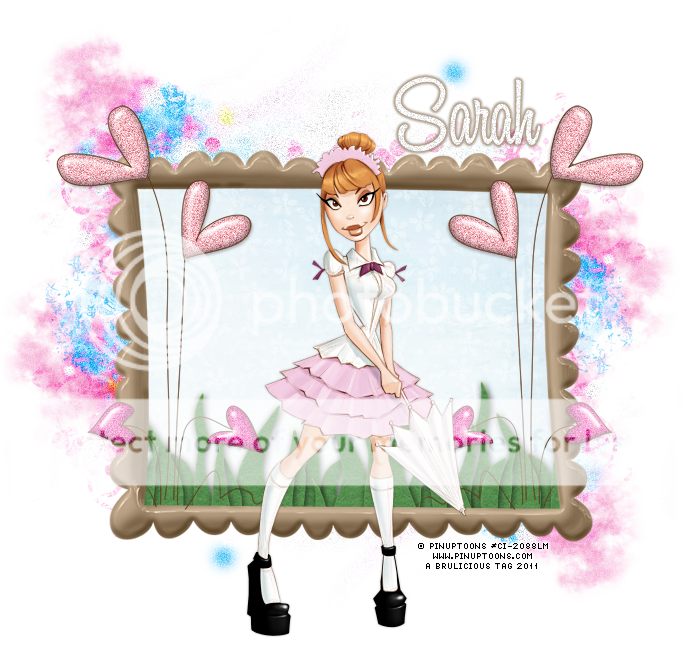
Hearts of Spring
This tutorial was written by Brunette on March 29th 2011.
Any similarity to any other tutorial is purely coincidental.
Do not copy and paste my tutorials or claim as your own you may link to them for group challenges.
You'll need a tube of choice I am using the cute art of Pinuptoons you can purchase his art to use for tags at CDO. Although mine was purchase at CILM when it was open.
Font of choice
Eye Candy 4000 - Gradient Glow
A kit of choice I am using a gorgeous collab kit by the wonderfully talented girls over at Pimp my tags with Scraps called Spring Love you can get it here.
Ready?
Let's get started!
Open up a new canvas 700x700 we can always re-size/crop later.
From Sarah's portion of the kit open up frame 3 copy and paste it as a new layer onto your canvas re-size it a little so its not too big and takes up too much of the tag
.
Take your magic wand and select inside the frame then go to selections-modify-expand by 3 then open a paper of choice I used paper 8 from the kit. Selections-invert and hit delete, make sure this layer is UNDER the frame layer. I also used the grass element from the kit placed it under the frame layer then used my eraser tool to erase what was over the sides of the frame. Make sure this layer is UNDER the frame layer as well.
Take your magic wand and select inside the frame then go to selections-modify-expand by 3 then open a paper of choice I used paper 8 from the kit. Selections-invert and hit delete, make sure this layer is UNDER the frame layer. I also used the grass element from the kit placed it under the frame layer then used my eraser tool to erase what was over the sides of the frame. Make sure this layer is UNDER the frame layer as well.
Next I added the grow with love element from the kit moved it to the left deleted the line that went along the bottom and over the frame to make it look like it was in the frame, then duplicated it and mirrored placing it on the other side.
I used splatter 2 from the kit pasted it as a new layer and moved it all the way to the bottom of the layer palette. Dupilcate, mirror and flip.
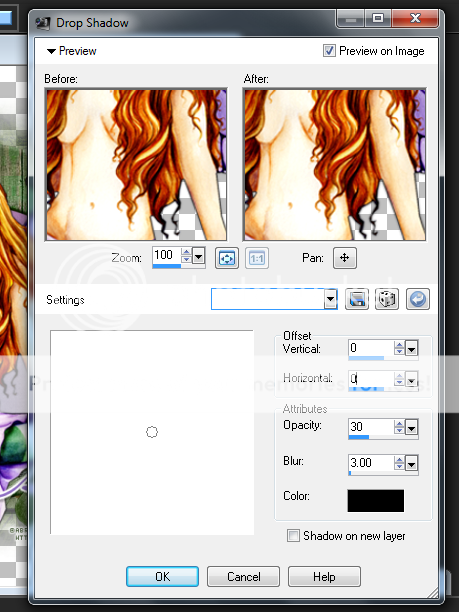
Now add your tube and a drop shadow shown in the screen shot below.
Now in a font of choice add your name with a gradient glow and a drop shadow. Settings I used shown in the screen-shot below.
Finally add your copyright and license number if applicable save as png or jpeg whichever you prefer and we're done!
I hope you enjoyed this tutorial and found it easy to follow.
Labels:
PTU Tutorials
|
0
comments
Monday, March 28, 2011
Spring In Bloom
This tutorial was written by Brunette on March 28th 2011.
Any similarity to any other tutorial is purely coincidental.
Do not copy and paste my tutorials or claim as your own you may link to them for group challenges.
You'll need a tube of choice I am using the gorgeous art of Robin McQuay you can purchase her art to use for tags Up Your Art.
Any similarity to any other tutorial is purely coincidental.
Do not copy and paste my tutorials or claim as your own you may link to them for group challenges.
You'll need a tube of choice I am using the gorgeous art of Robin McQuay you can purchase her art to use for tags Up Your Art.
Font of choice
Eye Candy 4000 - Gradient Glow
A kit of choice I am using a gorgeous kit by Laura of Cinnamon Scraps called Spring Delight you can find out how to purchase this kit on her blog here.
Ready?
Ready?
Let's get started!
Open up a new canvas 700x700 we can always re-size/crop later.
Open up frame 8 from the kit copy and paste it as a new layer onto your canvas. Take your magic wand and select inside the frame layer got to selections-modify-expand by 2 then open up a paper of choice I used paper 21 from the kit. Go to selections-invert and hit delete. Move this paper layer below your frame layer. Select none.
Then I added one of the brushes elements from the kit pasted it as a new layer over the paper layer and deleted what was outside the frame.
Copy and paste your tube. On your frame layer again select inside it with your magic wand and then go to selection-modify-expand by 1 then go back to your tube layer and use your eraser tool to erase what hangs over the frame. Select none.
Then I just used a few elements from the kit to decorate the tag.
Now in a font of choice add your name with a gradient glow and a drop shadow. Settings I used shown in the screen-shot below.
Finally add your copyright and license number if applicable save as png or jpeg whichever you prefer and we're done!
I hope you enjoyed this tutorial and found it easy to follow.
I hope you enjoyed this tutorial and found it easy to follow.
Labels:
PTU Tutorials
|
0
comments
Tuesday, March 22, 2011
Enchanting Butterfly
This tutorial was written by Brunette on March 22nd 2011.
Any similarity to any other tutorial is purely coincidental.
Do not copy and paste my tutorials or claim as your own you may link to them for group challenges.
You'll need a tube of choice I am using the gorgeous art of Abranda Icle Sisson you can purchase her art to use for tags Up Your Art.
Font of choice
Eye Candy 4000 - Gradient Glow
Mask of choice - WSL_Mask208
I couldn't find but I got it from WEESCOTSLASS she has FAB masks so I am sure if you take a look you'll find one you like.
You can find her blog here.
A kit of choice I am using a gorgeous kit by Sarah over at Pimp my tags with Scraps called Enchanted.
Ready?
Let's get started!
Open up a new canvas 700x700.
From the kit open up frame 2 take your magic wand and select inside the frame then open up a paper of choice I used paper 8 from the kit. Then go to selections-invert and hit delete move the paper layer below the frame layer.
Open up net one from the kit move it below the frame layer and off to the side a bit.
Open up the branch 1 element from the kit paste it as a new layer arrange it at the bottom of the frame. I did the same thing with the mushrooms element. Make sure to re-size them so they fit nicely.
Open up the latern from the kit re-size it so it fits nicely and place it on the frame I chose the left top side but placement is up to you.
Copy and paste your tube as a new layer and arrange to your liking, then add a drop shadow shown in the screen-shot below.
I used paper 3 from the kit pasted it as a new layer and moved it to the very bottom of the pallette. Then added a mask.
Now we're going to add your name in a font of choice, with a gradient glow and a drop shadow setting shown in the screen shot below.
Finally add your copyright and license number if applicable save as png or jpeg whichever you prefer and we're done!
I hope you enjoyed this tutorial and found it easy to follow.
Labels:
PTU Tutorials
|
0
comments
Sunday, March 20, 2011
Spring Garden
You'll need a tube of choice.
I am using the gorgeous art of Tatjana Willms you can purchase tubes to use for tags here.
Font of choice.
Eye Candy 4000 - Gradient Glow
A kit of choice I am using part of a fab kit from the girls over at Pimp my tags with Scraps called Spring Love. I am using Pimp'd Designz portion.
Ready?
Let's get started!
Open up a new canvas 700x700 we can alway scrop/re-size later.
Now open up frame 4 from the kit copy and paste it as a new layer onto your canvas. Take your magic wand and click inside the frame then go to selections-modify-expand by 4. Now open up a paper of choice I used paper number one then selections-invert and on the paper layer hit delete. Move this layer below the frame.
Open up the rainbow element from the kit copy and paste it as a new layer re-size it so it fits nicely then move it below the frame layer BUT above the paper layer. Erase any bits that over hang then duplicate and mirror it.
Open up the greens element from the kit copy and paste it as a new layer on either side of the frame re-size so it fits nicely duplicate and mirror it. Now open up a flower element from the kit I used number 4 and place it at the top of the greens duplicate and mirror.
I used different elements for the tag and just sort of decorated it. I used the bunny and lady bugs. As well as the glitter circle from the kit I used that for the bottom layer then duplicated it and mirrored it, arranging it to my liking.
Copy and paste your tube as a new layer re-size it if it doesn't fit nicely. Duplicate it and change the blend mode to soft light and add a drop shadow same as the screen-shot below.
Now we're going to add your name in a font of choice and add a gradient glow shown in the screen-shot below as well as the drop shadow used.
Finally add your copyright and license number if applicable save as png or jpeg whichever you prefer and we're done!
I hope you enjoyed this tutorial and found it easy to follow.
Labels:
PTU Tutorials
|
0
comments
Tuesday, March 8, 2011
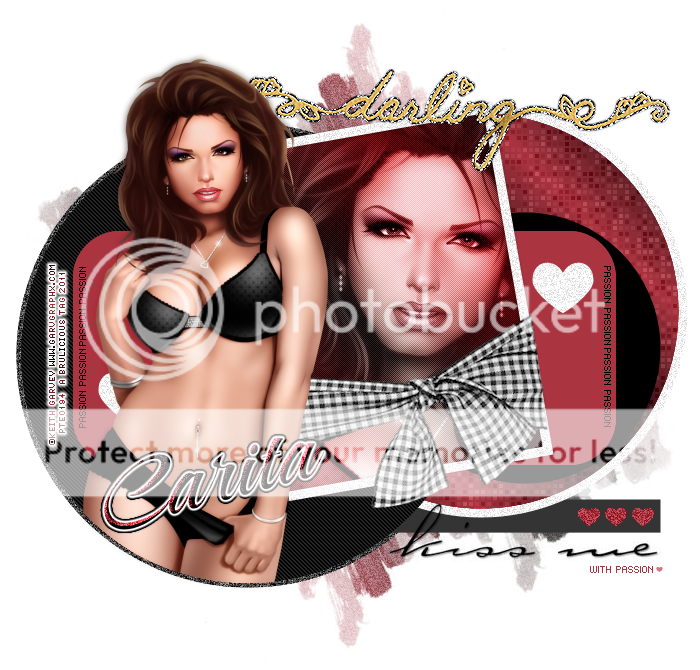
Darling
*Click the tag to see a larger view*
You'll need a tube of choice preferably one with a closeup.
.
I am using the gorgeous art of Keith Garvey you can purchase his art to use for tags at PTE.
Tag Template 319 by Missy of Divine Intentionz here.
Font of choice
Mask Vix350 by Vix which you can get here.
Eye Candy 4000 - Gradient Glow
Xero - Fritillary
VanDerLee - Unplugged X
A kit of choice I am using a gorgeous kit free by Laura of Cinnamon Scraps called French Kiss which you can download from her blog here.
Ready?
Let's get started!
Open up the template shift + D to duplicate it close out the original.
Delete the copyright layer.
On Circle1 layer selections-select all-float-defloat add a new raster layer and flood fill with a color of choice I used a dark grey, then add some noise to make it stand out. Repeat the same steps for Raster1 layer EXCEPT do not add any noise to this layer. Close off the original layers.
Next on Circle3 layer selections-select all-float-defloat add a new layer and flood fill with a gradient of choice I used a background-foreground gradient. Then add Xero Fritillary settings shown in the screen-shot below. Close off the original layer.
On the Rounded Edges Rectangle layer seletions-select all-float-defloat add a new layer flood fill with a color of choice and close off the original layer.
On the Frame background layer selections-select all-float-defloat add a new layer and flood fill with the gradient we used earlier. Open up your close up and paste it as a new layer then go to selections-invert and hit delete make sure you are ON the tube layer when you do this. Then duplicate it go to adjust-blur-gaussian blur- 3 change the blend mode to soft light and the original layer blend mode to Luminane L. I also added VanDerLee - Unplugged X - Pattern offset, use the settings that fit your tag, on the top layer of the closeup.
On the with passion layer selections-select all-float-defloat add a new raster layer and with your paint brush and a color of choice paint the words to match the tag. Select none and close off the original layer.
On heart 1 & 2 layer add some noise.
On the 3 hearts layer selections-select all-float-defloat add a new raster layer flood fill with a color of choice to match your tag and add some noise. Close off the original layer.
Open up Ribbon Wrap 2 from the kit paste it as a new layer I rotated it and re-sized it to fit nicely around the
frame.
Open up the wordart from the kit paste it as a new layer I placed mine at the top and re-sized it so it fit nicely on the tag.
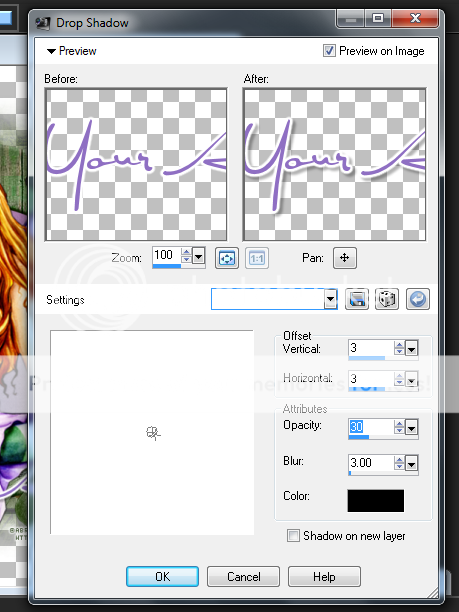
Now we're going to add our tube so open that up copy and paste it as a new layer I put it over in the cirlces. Now if you have some of the tube hanging over here is how you fix that. Go to the Circle2 layer selections-select all-float-defloat-invert then back on your tube layer and use your eraser brush to erase what is hanging over. Duplicate this layer and go to adjust-blur-gaussian blur-3 and change the blend mode to soft light and add a drop shadow. Settings shown below in the screen-shot.
Now we're going to add a mask layer to the very bottom of the tag just to add something to it so add a new layer and move it to the bottom of the layer pallette. Flood fill with the gradient from earlier and add the mask, then a little noise effect.
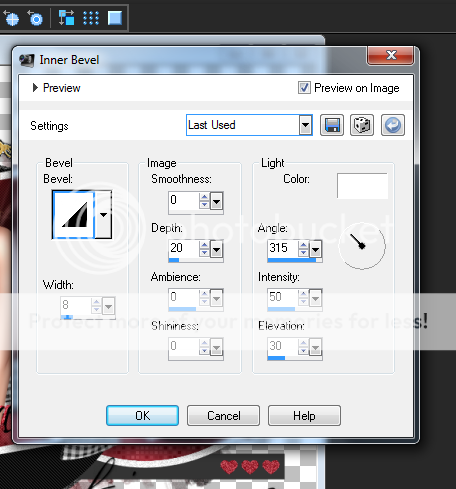
Its time to add your name in a font of choice, I also added some noise, inner bevel,gradient glow and drop shadow. Screen-shot below shows the settings for the gradient glow,inner bevel and the drop shadow the noise setting is whatever fits your tag or tastes.
Finally add your copyright and license number if applicable save as png or jpeg whichever you prefer and we're done!
I hope you enjoyed this tutorial and found it easy to follow.
Labels:
FTU Tutorials
|
0
comments
Subscribe to:
Posts (Atom)


